
DTG

Dark or light fabric.
White ink, with control.

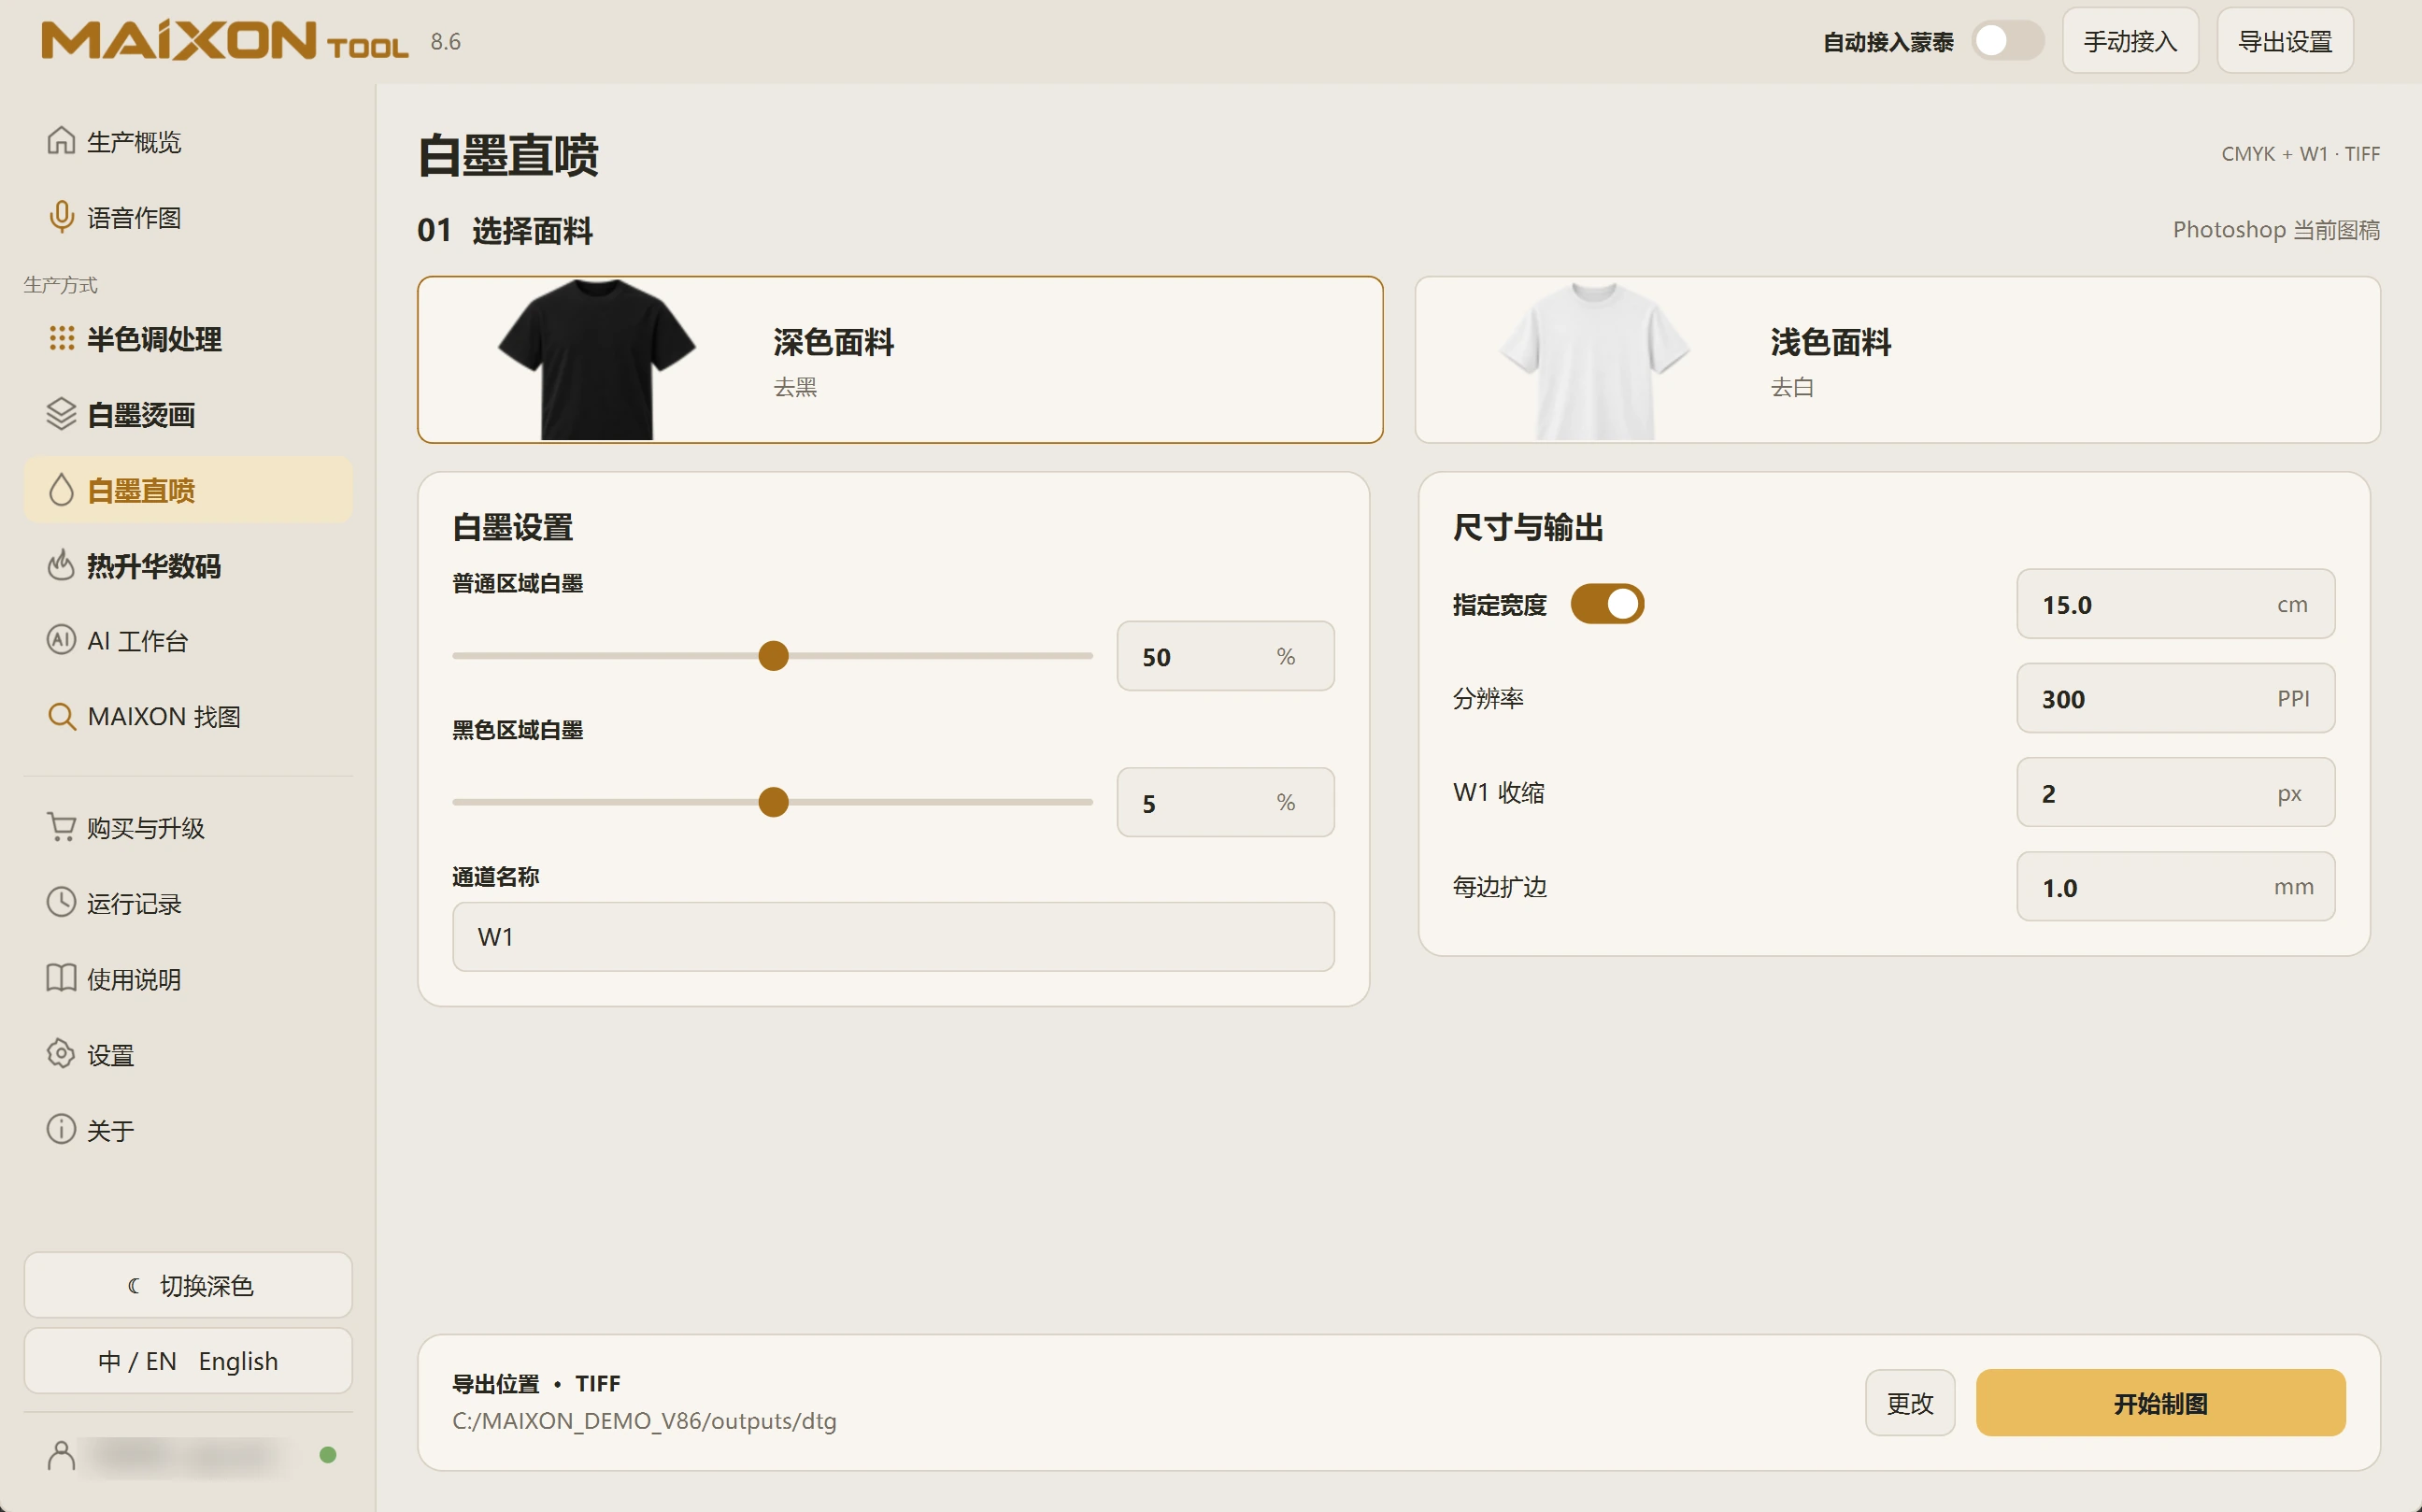
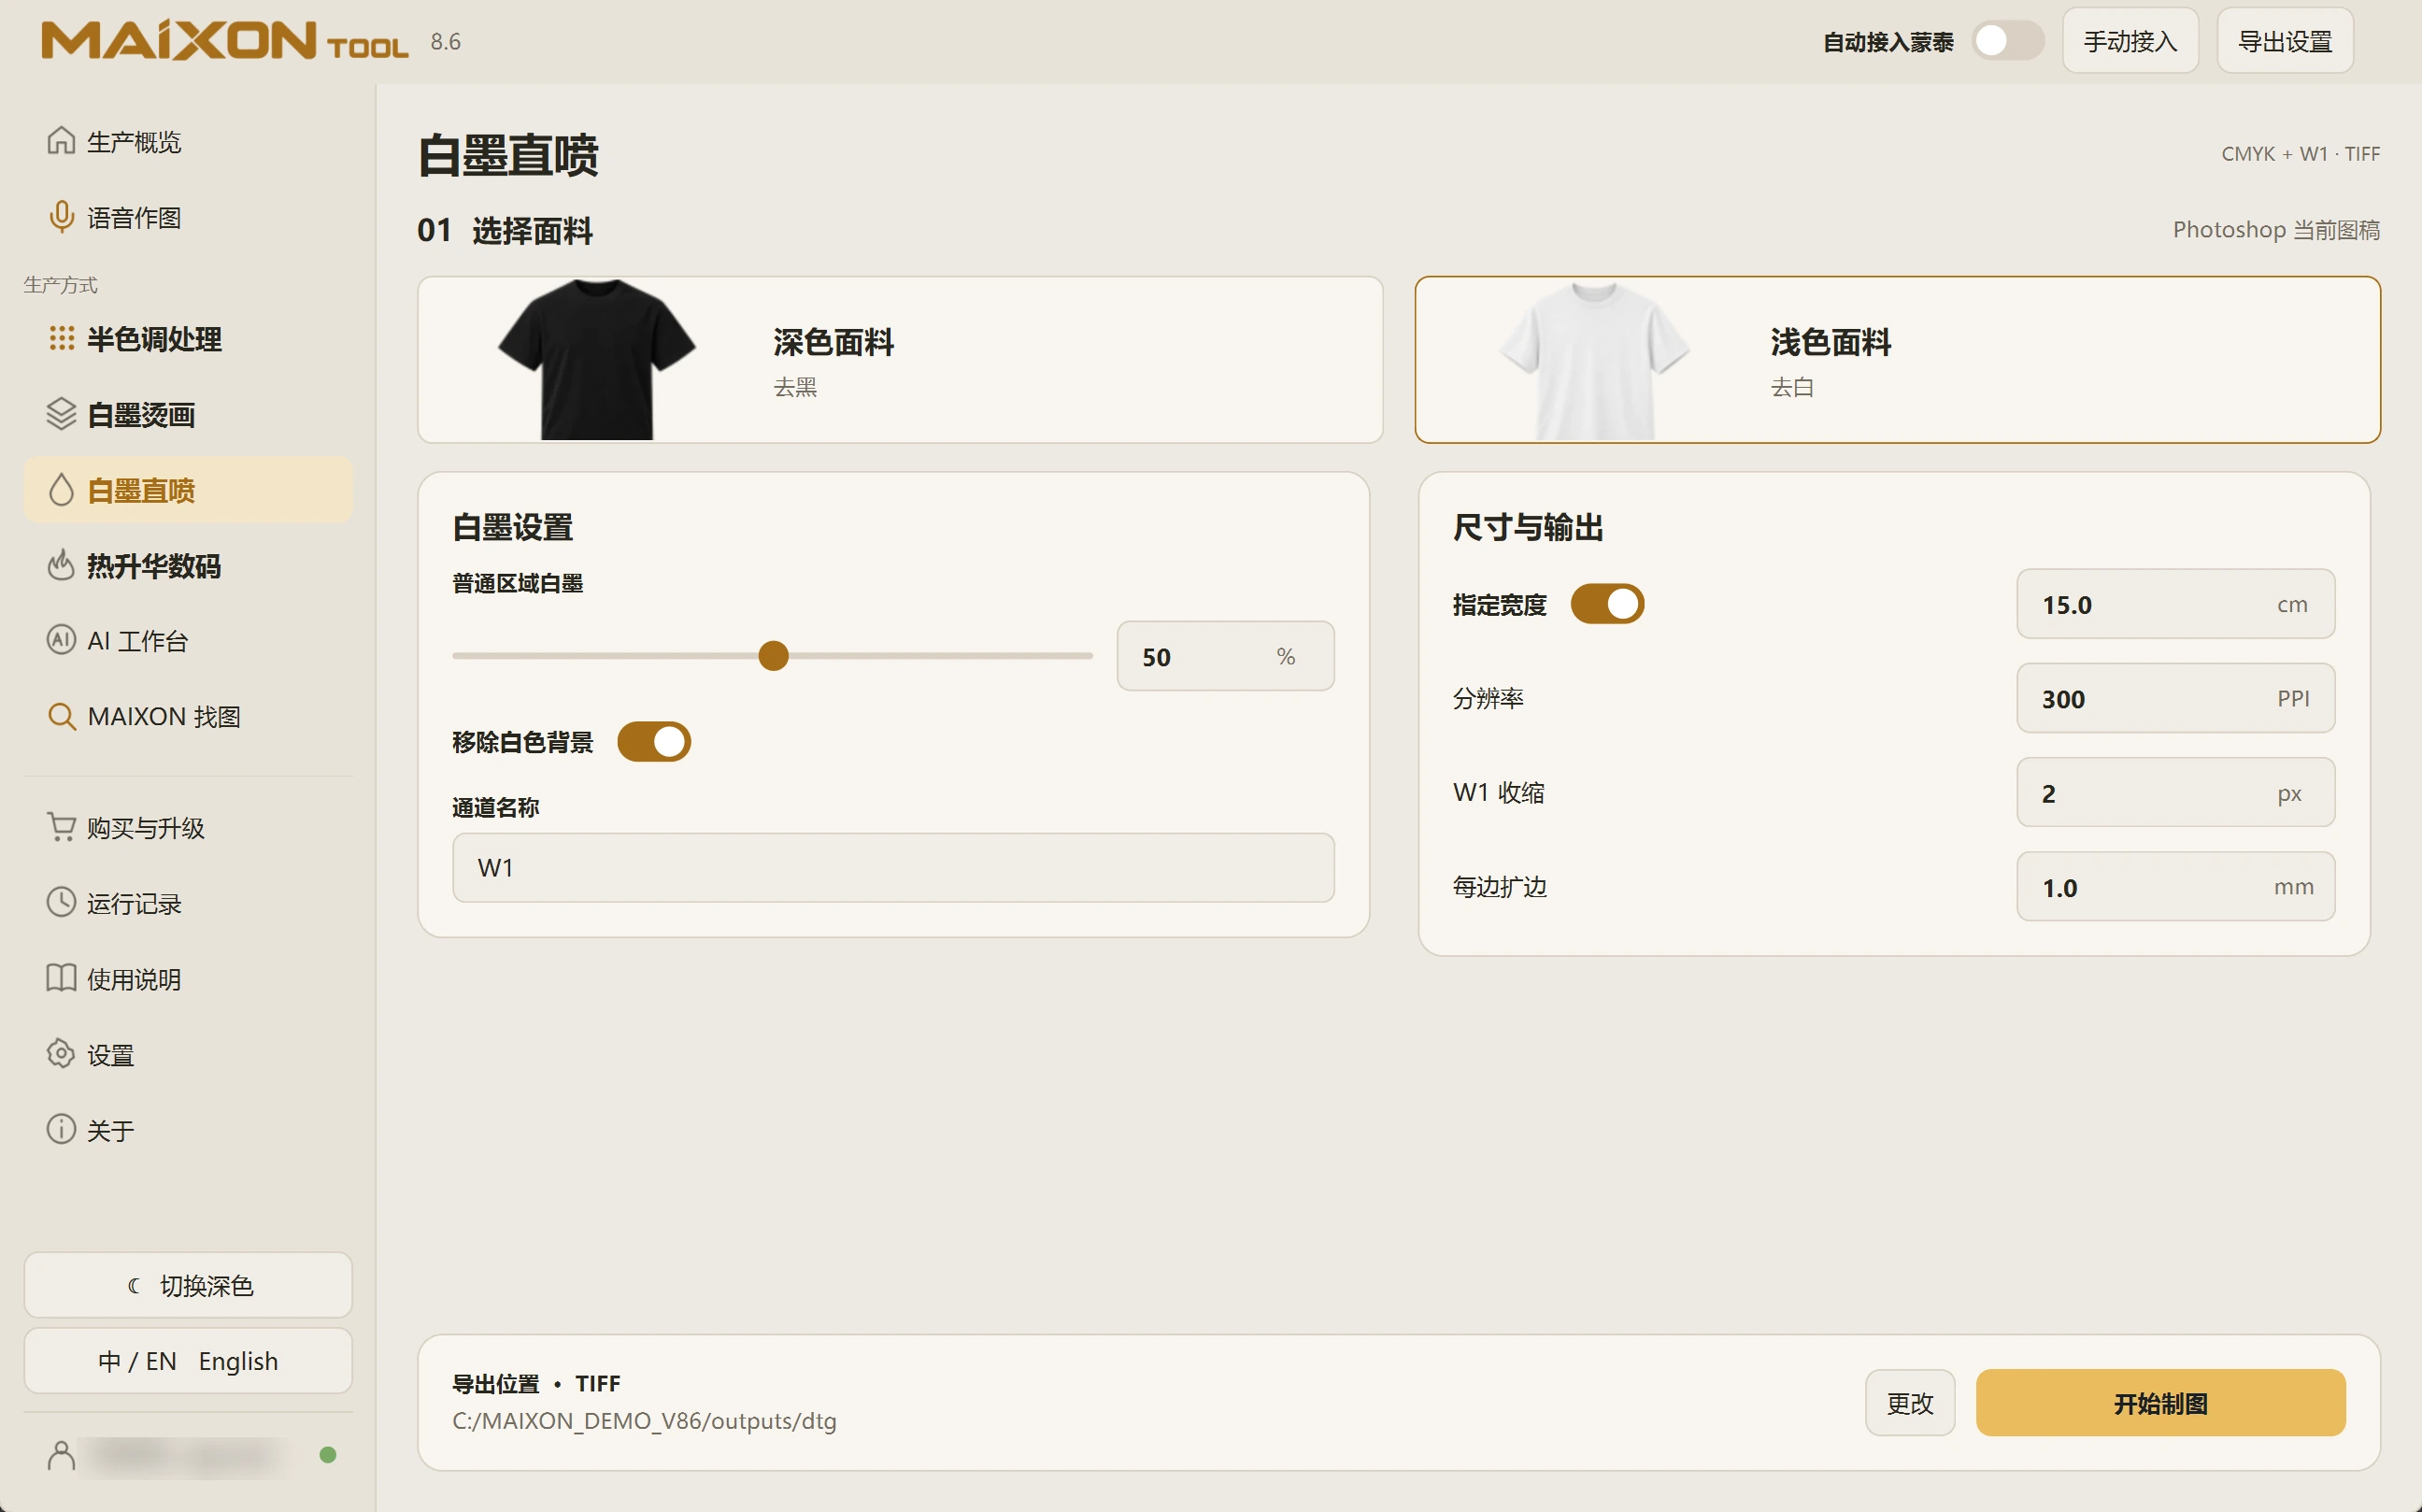
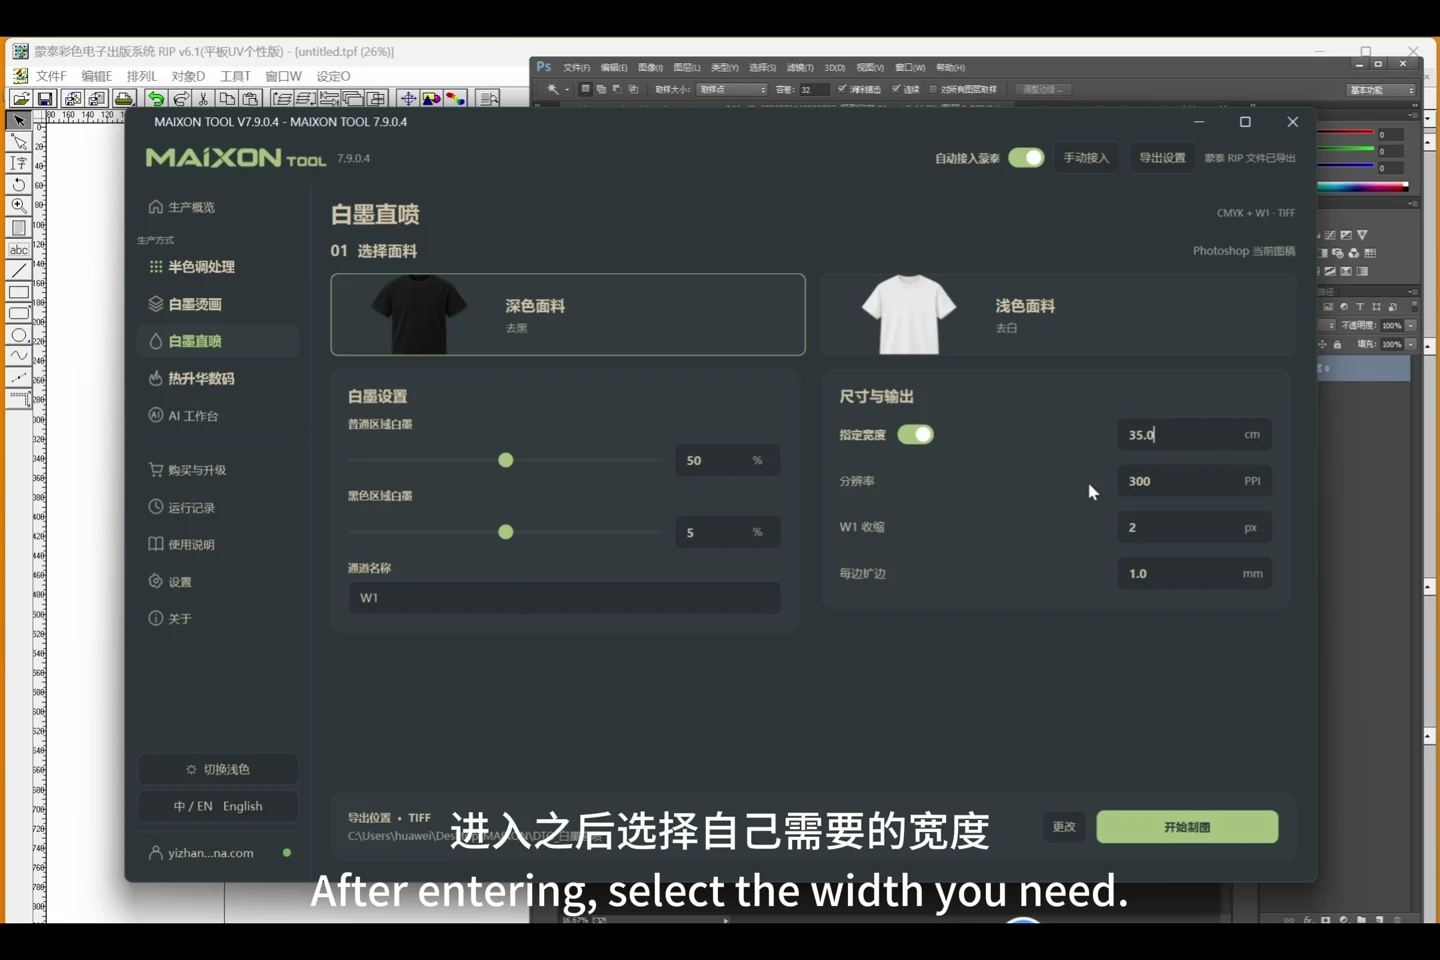
Choose the fabric type, adjust white ink for regular and black regions, then review dimensions, channel naming, choke and margins. Process the current Photoshop artwork and export.

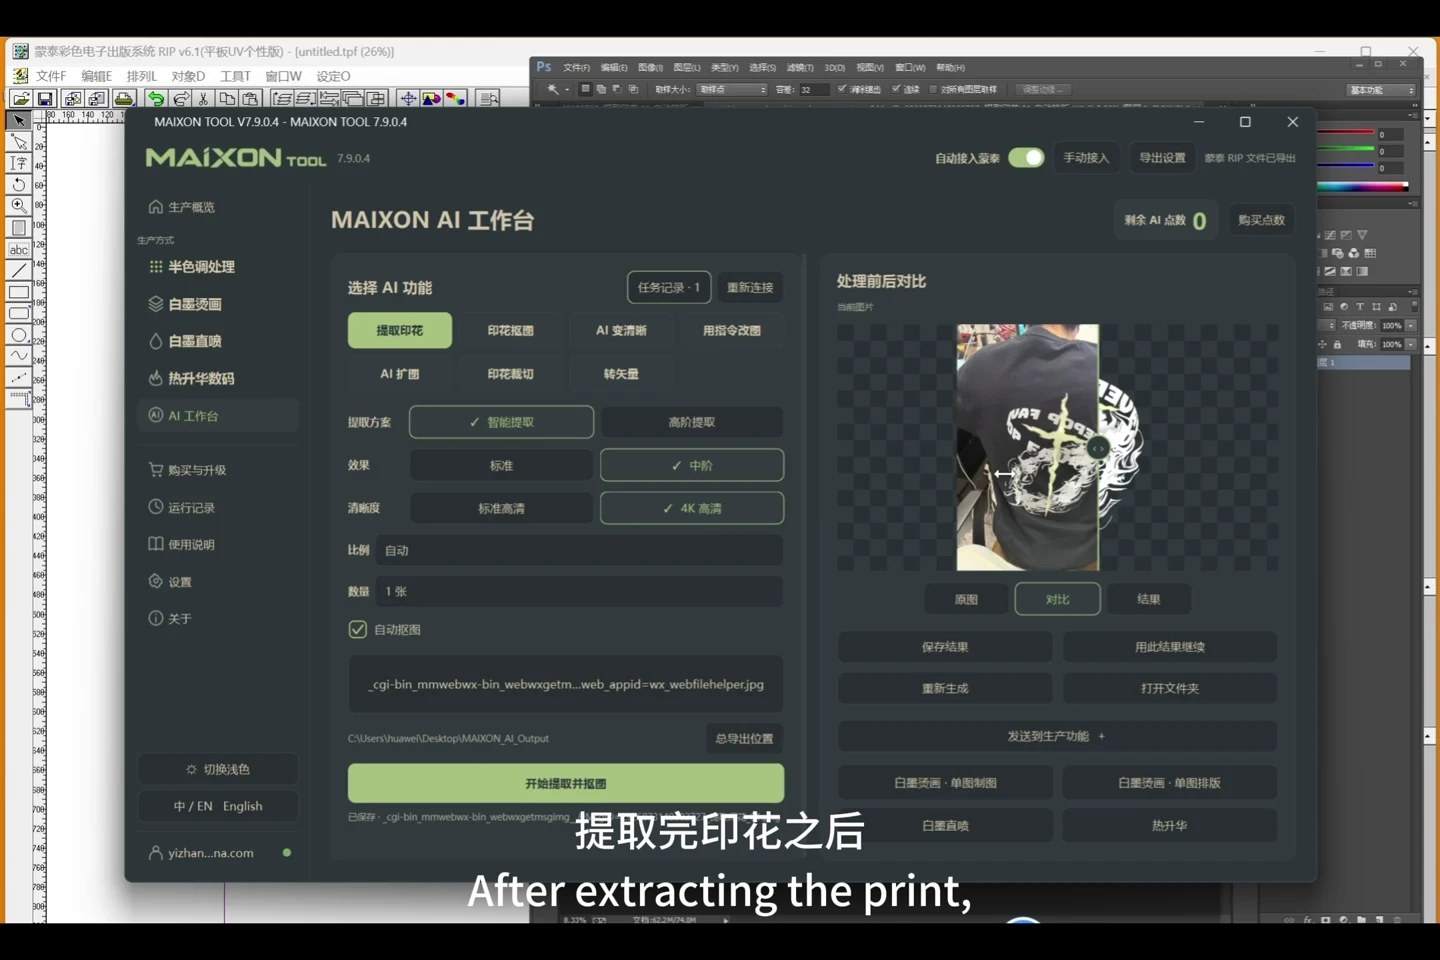
AI artwork to DTG and MainTop0:52
MAIXON × MainTopContinue automatically into MainTop.

Explore each capability.

Start your first task in this order.

  1. Open artwork and choose the fabric type
  2. Set white ink for regular and black regions
  3. Review dimensions, W1 choke and edge margins
  4. Run and inspect the color and white channels

A few details to check.

  • 5% white ink for black regions refers to underbase quantity, not color opacity.
  • Adjust for the actual fabric, ink, device and print sample.
  • Inspect channels before RIP processing and retain the original artwork.

01 · Start from the fabric

Choose the dark- or light-fabric workflow based on the substrate and production plan.

Keep an original copy and confirm the active Photoshop document.

02 · Set white ink independently

Regular and black regions have separate white-ink controls. The substrate can contribute to the appearance of black regions.

5% white ink means underbase quantity; it does not remove 95% of the color artwork or set overall image opacity to 5%.

03 · Review channels and output

Review physical size, resolution, white-channel name, choke and margins against the order and sampling experience.

Use a separate output folder. Do not switch or manually modify the Photoshop document during the task.

04 · Inspect color and W1

Inspect the color composite and W1 separately, including black-region coverage.

Confirm RIP channel recognition and test on the actual fabric before production.

Explore every view.

Choose your operating system

Select the version that matches your computer.

  1. 01

    Windows 7

    V8.3

    Download
  2. 02

    Windows 10

    V8.3

    Download
  3. 03

    Windows 11

    V8.3

    Download
  4. 04

    macOS

    Coming Soon